Author Overview
When logging in to WISEflow this is the overview you will se as an Author. Note that you can still use the older version of the author tool if you want to. You will find it in the lower right corner. If you have used WISEflow before this is where you will find your sections that you have created.
If you have used WISEflow before you can export/import your previous sections from the older tool to the newer. See separate guide on this page for how to do this. You can chose to import one or up to 20 sections per import and you can import as many times as needed.
Note that you will "land" in FLOWmulti automatically in the new tool. If you want to use FLOWassign/FLOWlock you will need to go to the old tools (see below).
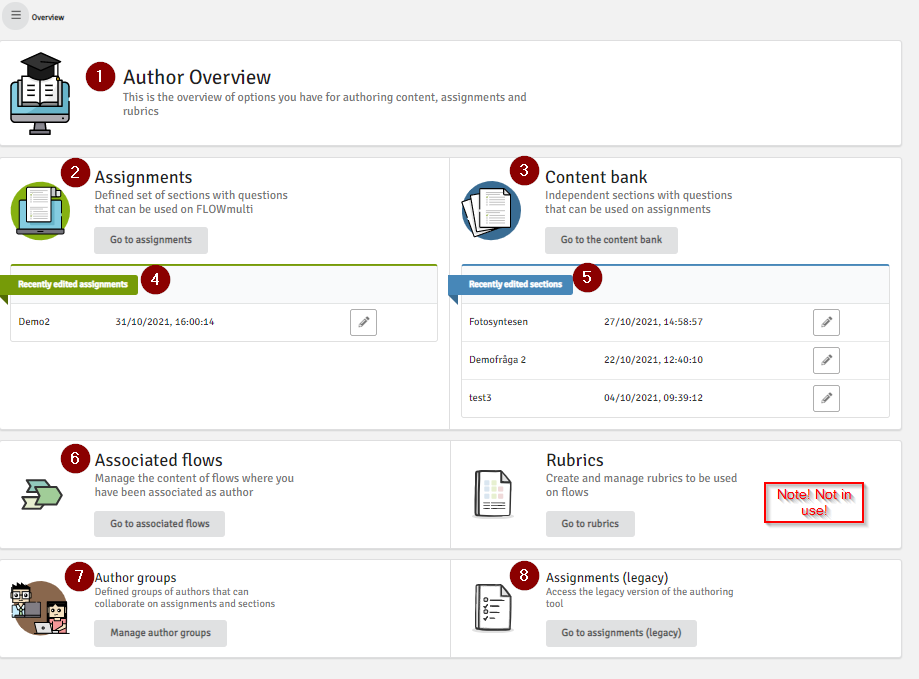
- When opening the Authors tool you will see this Overview
- This is where you will find your assignments/examinations
- Here you will find your Content bank, with your sections/questions
- If you have created assignments before, you will find the last ones you edited here. Use the pen-icon to go to edit.
- If you have created sections/questions before, you will find the last ones you edited here. Use the pen-icon to go to edit.
- Here you will find the flows that you as an author have access to.
- Here you can create and edit your Author groups
- Here you can access the legacy Author tool (old version)
Note! Headings are not used at University of Borås
How to navigate in the tool
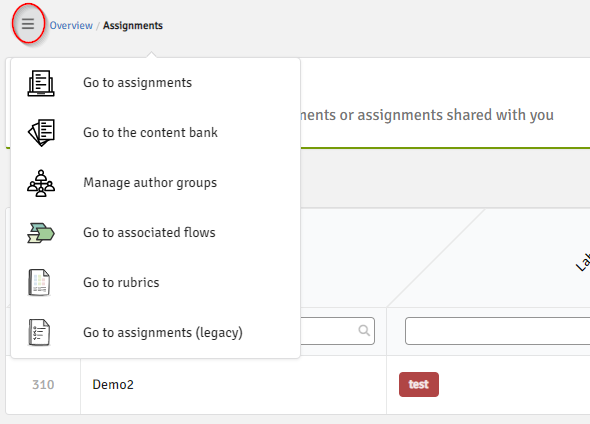
In the upper left corner you will find how to navigate between the workspaces:
 By clicking the "hamburger" you will unfold the menu:
Assignments
Under assignments you will be able to create, edit and erase your assignment/exam.
You can create a section (question) directly in your assignment or choose to download one from your Content bank.
That means you can create a section in the Content bank and then use it in an assignment later on.
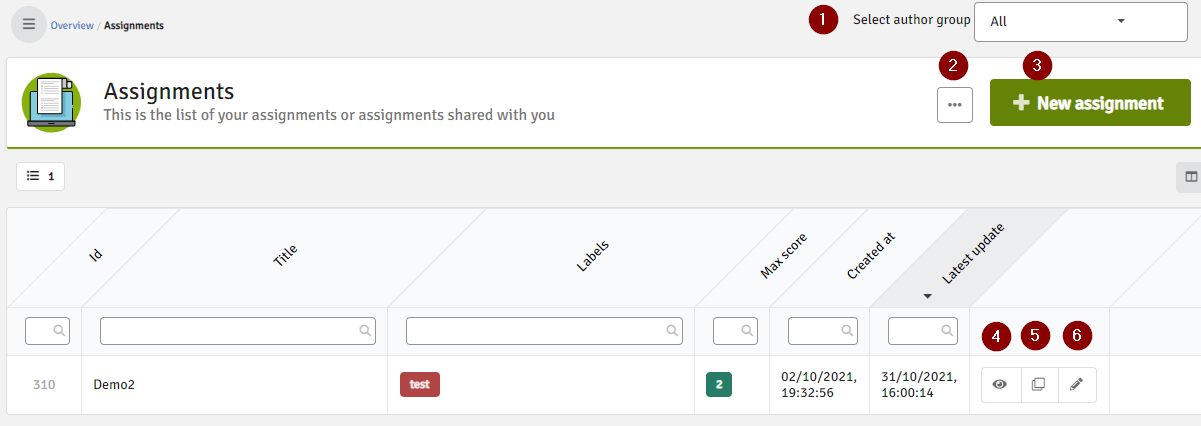
- Here you can filter the assignments by author groups
- Here you can manage your assignment. You can delete assignments permanently, assign and delete author groups and import/export assignments.
- This is where you create a new assignment.
- This is where you can preview the assignment.
- Make a copy of your assignment. The new assignment will be shown as an original.
- Here you can edit your assignment.
Create a new assignment/exam
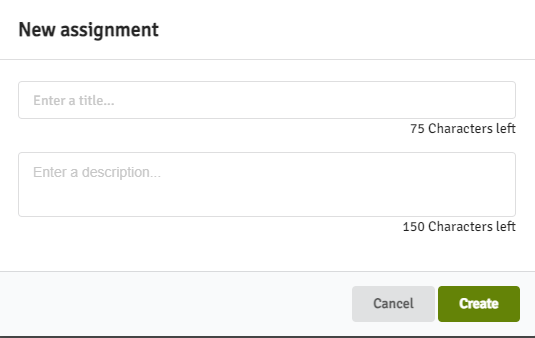
When you click on "New assignment" you will see a pop-up window. Enter a title for your exam (and if you want a description, it is not mandatory). There is a limit for how many characters you can use and that is shown under the "windows". When you are done editing press "Create".
When you click Create you will see this:
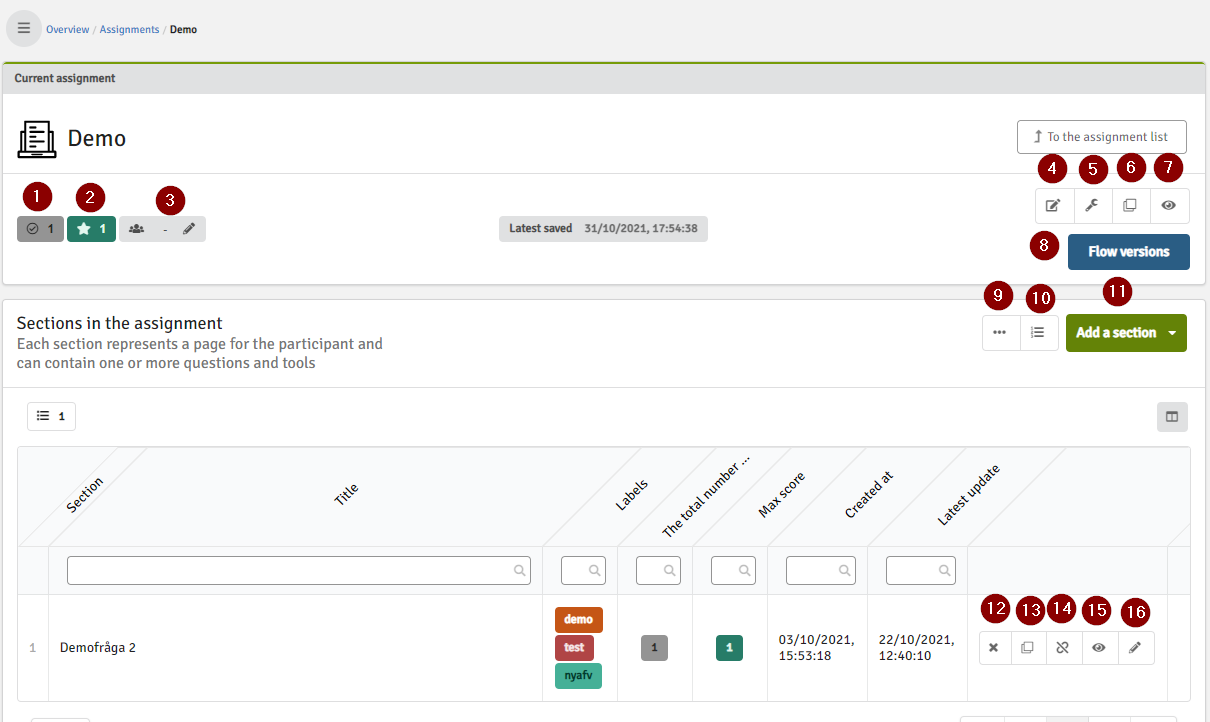
- This is where you see the total score of the assignment/exam
- This is where you see the total sections/questions added to the assignment
- Here you can assign an Author group to your assignment
- Here you can edit the name of your assignment, create a description and put "tags" on your assignment to make it easier searching on these tags in your Content bank later on.
- This is where you configure your assignment.
(Note that you should ALWAYS de-activate Negative scores here as it is for the WHOLE assignment. If you want to work with negative scoring you edit that under each section!)
- You can make a copy of your assignment here. The new copy will be shown as an original.
- This is where you can preview your assignment/exam.
- This is where you create a flow version. You need to do this to be able to add your assignment to an associated flow. It locks for editing.
- This is where you manage your sections/questions in the assignment.
- Edit the order of the sections in your assignment
- Click here to add a new section to your assignment. you can choose to create a new section or to import it from your Content bank.
- If you want to delete a section from your assignment you do it here.
- This is where you can make a copy of your section/question. The new copy will be shown as an original.
- If you want to this is where you can export your section to the Content bank
- This is where to preview your section.
- To edit your section click here. You can choose to tag your sections so that it will be easier to search for the sections in your Content bank later on. This is how to do that:
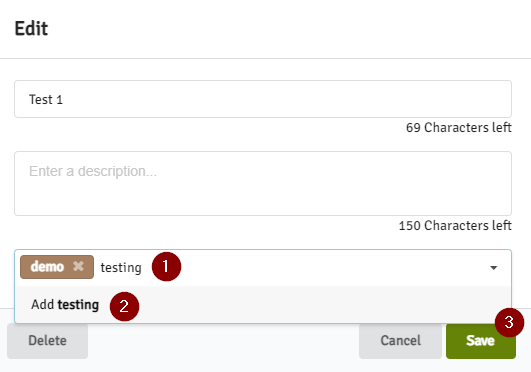
- Write the name of the tag
- Press add
- Press save
Sections
You can create sections directly in your assignment (and choose to upload to your Content bank if you want to). or you can choose to import sections/questions from your Content bank to the assignment.
Create a new section directly in your assignment
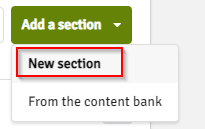
To add a new section directly in your assignment press "Add a section" and then "New section"
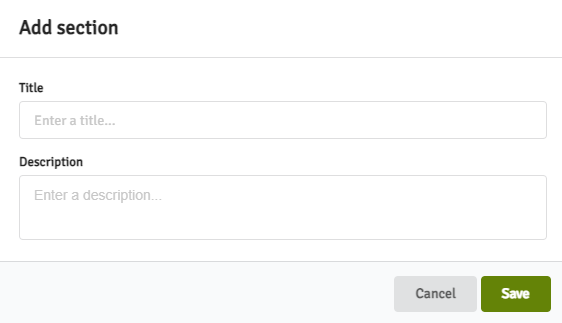
You will now see a pop-up window. Enter the name of your section/question and if you want to add a description (optional). When done editing click "Save".
You can put tags on your sections later on by editing each section. (see nr 16 on previous picture).
When you click Save you will see this:
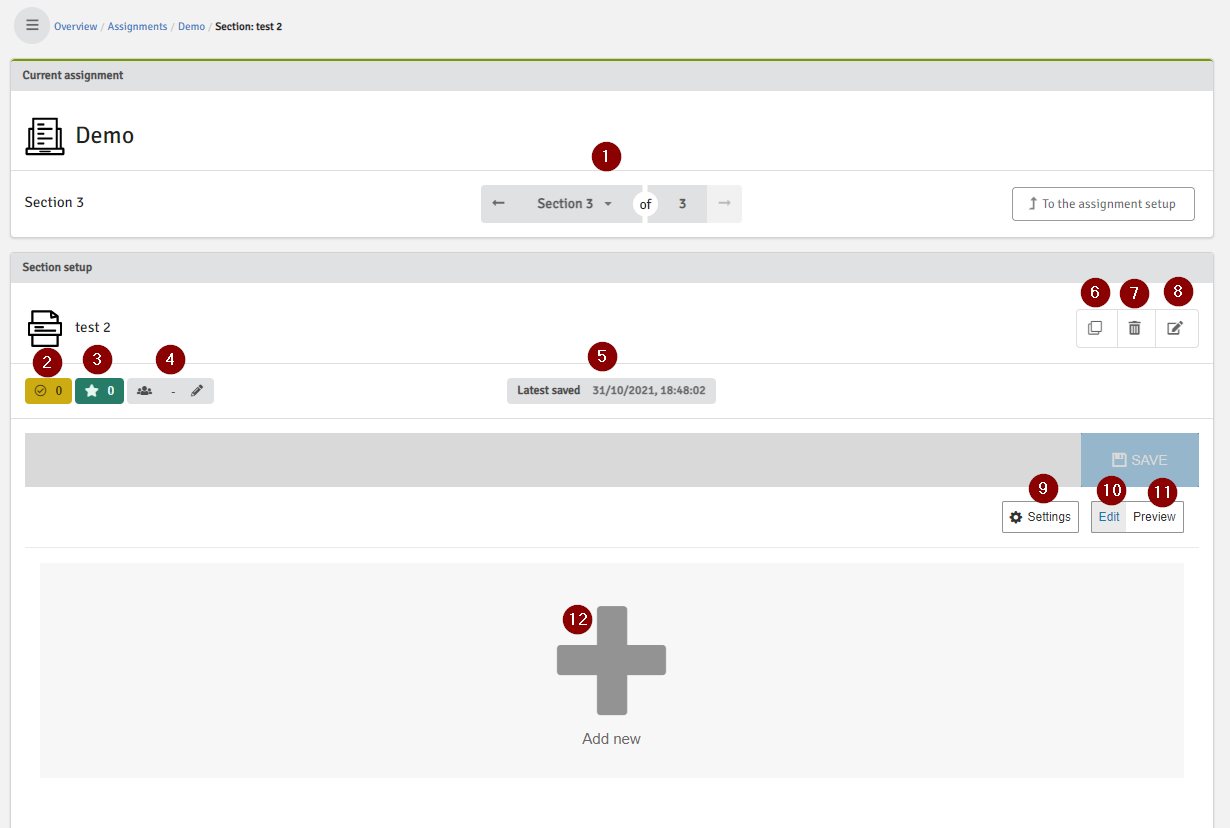
- This shows which section you are working on right now
- This is where you can see the total amount of sections added to your assignment
- This shows the highest/the total score on the assignment
- Here you can add an Author group to the section
- This is when the section was last saved
- Click here to create a copy of the section. The copy will be a new original.
- Here you can erase a section permanent (NOTE! It will be erased from the Content bank to!)
- Click here to edit the title of your section
- You can change the layout of your section and also choose to add CSV data here
- Here you can edit the section you have created
- Click here to preview your section.
- Here you create a new "under section", in your section.
Upload a section from your Content bank
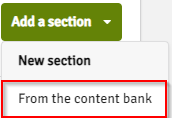
To add a section from your Content bank press "From the content bank"
You will now see a view over the sections you have created in or saved to your Content bank.
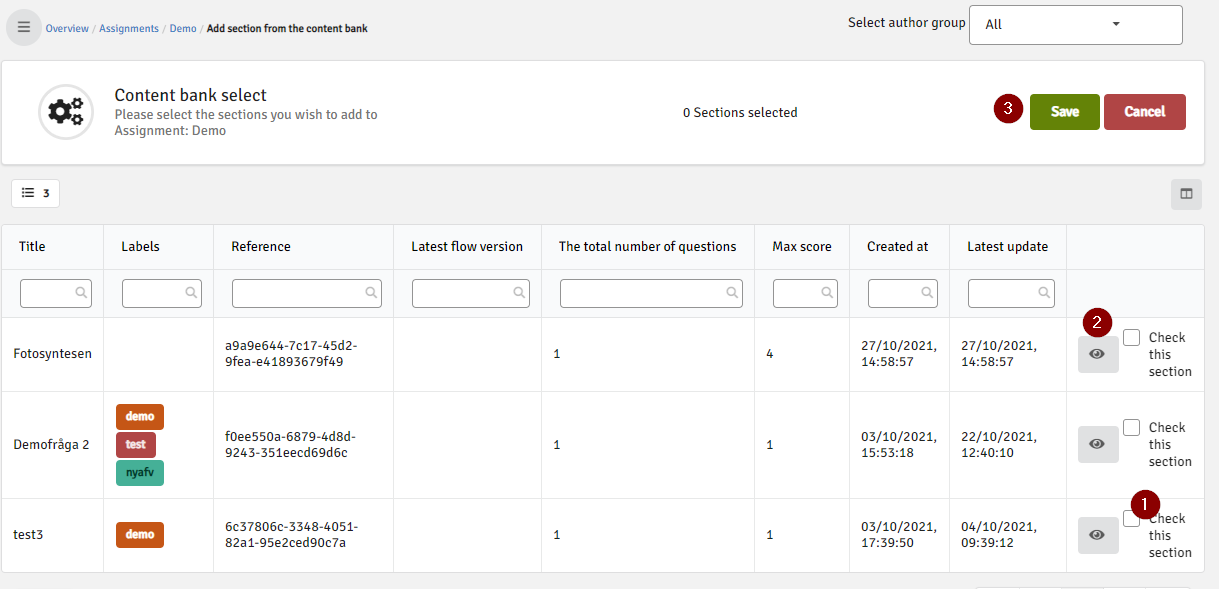
- Check the sections you want to upload to your assessment
- Preview the sections if you want to
- Press "Save"
Create a new flow version
To be able to add an Assignment to an associated flow (an exam session), you must create a flow version of your assignment. This makes it read-only, i.e. locked for editing. The ability to create a new flow version of your task is only available after you have edited your assignment.
If you need to edit something in an assignment that you have already added to a flow, you delete it from the associated flow (under Associated flows). You then edit your assignment and then you create a new flow version of the assignment (which is locked for editing) to be able to add it to the flow again, under Associated flows.
When you create a flow version, you can add a note. Notes are not mandatory and cannot be changed when you tap Create flow version. If you do not want to enter a note, just click on "Create flow version" to close this box.

Click on Flow version and then Create a new flow version.
Now you get a view of the read-only version of the assignment.
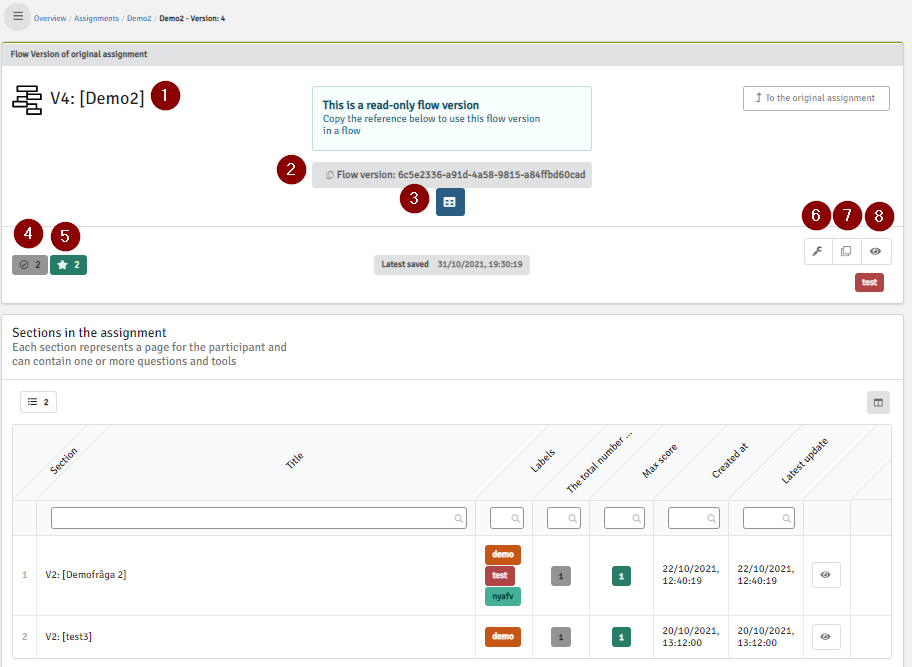
- This shows which section you are working on
- Here you see the reference code of the version you are working with
- If you click here you will see a list over the flow versions you have created for this assignment/exam.
- This shows the total amount of sections for this assignment
- This is the total credits on the whole assignment
- This is where to configure the assignment/exam
- To make a copy of the assignment click here.
- Click here to preview the assignment
If you have started editing again in an assignment of which you have already created a flow version, you will see a new button appear next to the blue button Flow versions.
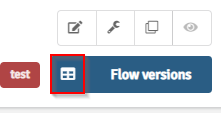
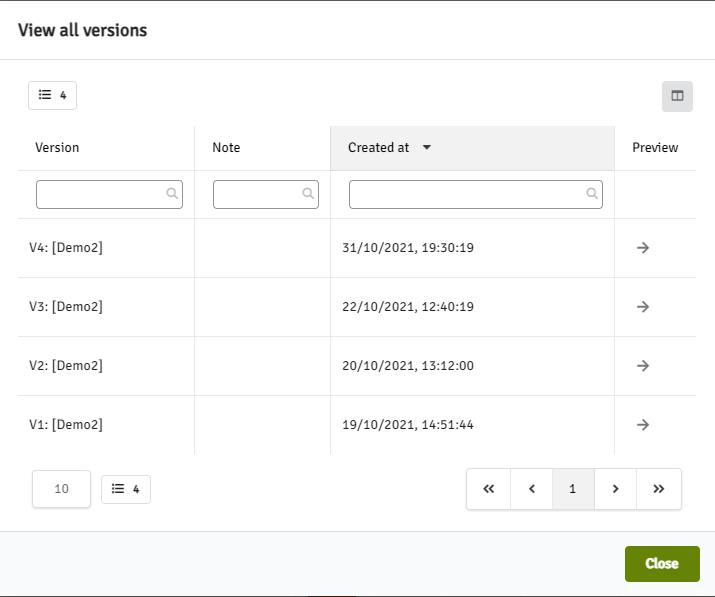
If you click this new button you will see all the flow version you have created for this assignment. You will get access to previous flow versions by clicking the arrows to the left (preview)
Attach a flow version of the assignment (exam) to an associated flow (exam session)
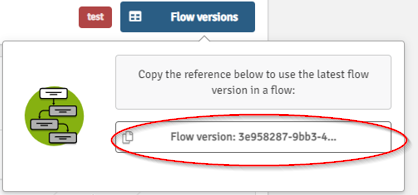
By clicking on the reference code you get for a new flow version, you automatically copy that reference code (you "bring" this code with you).
Go to Overview and select Associated flows. Find the flow/exam session and attach your assignment/exam to it by pasting the reference code that you "carry with you" (ctrl + v).
Then click on "Attach".
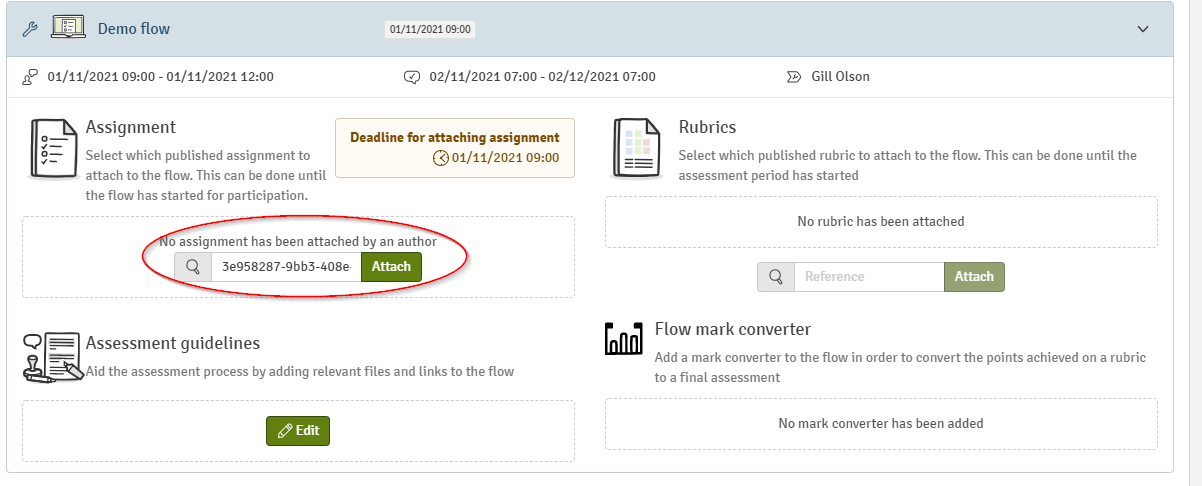
When this is done, you have added your exam to your exam opportunity!
IMPORTANT! The deadline for attaching or replacing the exam to a flow is the same time as the exam is to start.
BUT if you add / change the exam during the last hour before the start, you must notify this the examination hall alt to the WISEflow administration! Examiners must then update their browsers
to get access / correct version! This is very important!
Show flow version in published data
Under Published assignments (under Associated flows) you can see which flow version you have attached to your associated flow (exam session)


 By clicking the "hamburger" you will unfold the menu:


